Adding A New Circuit To Your Breaker Box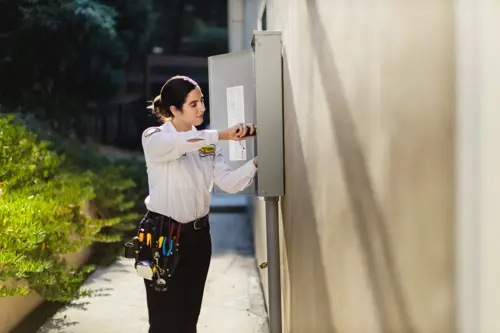
Whether you’re remodeling a kitchen, bathroom or some other part of the home, you’ll need additional power to support new outlets, lighting and larger appliances. Adding a new circuit to the breaker box is the best way to safely handle the increased electrical load.
Older breaker boxes may not have the space available to add a new circuit. Which means you could be looking at a panel replacement if you wanted to add a new circuit.
The installation process for adding circuits requires expertise and precision. It’s usually best to let a professional handle the project. However, this doesn’t mean you can’t do the job yourself. Read on to learn all about adding new circuits to breaker boxes.
Circuit Breaker Installation: What You Need to Know
We are firm believers in the power of safe do-it-yourself projects. That’s why we’ve always been hesitant to demonstrate how to access a breaker box and install a new circuit breaker. Still, we know that many homeowners add new circuits all the time.
If you decide to take on this project yourself, you should be aware of the many dangers. Even with the power off, it’s possible to touch the wrong wires and suffer a grave injury. This is because the lugs where the power enters the panel are always live. The best way to reduce the risk of electrocution is to avoid contact near the main terminals. It’s also wise to use insulated tools and wear appropriate gear, like rubber gloves and shoes.
Arc flashes are another possible danger. This happens when a current jumps through the air. It can cause severe burns, blindness or even death. Double-checking that the power is off is a crucial way to avoid this hazard.
You also have to think about fire hazards. If you install the new wires incorrectly, like placing the neutral wire in the wrong terminal, it can lead to overheating, short circuits and fires. You need to be very familiar with wire sizes, breaker types and code requirements to prevent dangerous mistakes and safety violations.
Another risk you want to avoid is an overloaded panel. If you add too many circuits or the wrong-size breakers, you risk overheating or tripping mains. You must know your panel’s amp limit and total draw to prevent overloads, tripped breakers and fire risks.
Tools and Supplies
Now that you understand the risks, it’s time to decide whether you want to tackle the project yourself. If so, here are the tools and supplies you’ll need.
Get the manufacturer’s name, model number and style numbers of the permitted breakers for your breaker box. Then go ahead and get yourself a breaker.
Go to an electrical provider if your local home center doesn’t offer the model or brand you’re looking for. Even if the breaker fits within the box, you can’t install a different model breaker unless the manufacturer has given their stamp of approval. If you do, you risk voiding warranties and potentially causing safety hazards.
Get some plastic snap-in cable clamps that measure 1/2 inch while you’re at the store. You’ll need these to attach the new cable. You can install them without putting your hand in the panel, making them safer than metal clamps.
Since you’ll be turning off the home’s electrical power while adding the new circuit, you’ll need a bright work light. We find a lot of DIYers enjoy using an LED headlamp because it keeps their hands free and provides excellent, focused lighting. Other tools that you’ll need include electrical tape, wire cutters, a circuit tester, a utility knife and a flat-bladed screwdriver or a No. 2 square-drive tip for your multi-bit driver.
Before you start the project, review all relevant electrical codes and be cautious. Breaking the rules is not something you want to do.
Close Look at the Breaker Box
Below is a list of the different parts in your electrical panel. Yours might not be the exact same but it should be close.
- Main lugs: These are always live, even with the main breaker turned off. Never touch them!
- Main cables: The ones colored black stay live all the time. Even if they’re insulated, you should always avoid touching them.
- Main breaker: Before you remove the cover of the panel, be sure to turn the main breaker off.
- Breaker: Each circuit’s hot wire—often color-coded red or black—connects to its corresponding breaker.
- Breaker bus: This component is responsible for distributing electricity from the main breaker to each individual circuit breaker. Every circuit breaker connects to the bus.
- Neutral bus: This is where the white neutral wire and ground wire connect. The white neutral wire also connects here when using a regular breaker. When installing an AFCI breaker, you’ll need to run a “pigtail” wire so that it connects to the neutral bus.
- Breaker space: These are the specific openings that house the circuit breakers. Most electrical panels have anywhere from 20 to 60 spaces. You’ll need to count the available spaces to determine how many new circuits you can add.
Step 1: Turn Off All Power and Remove the Cover
Make sure to power down all computers in your house before switching off the electricity. Then, go to the main breaker and switch it off. Next, remove any screws holding the panel cover on the box and remove the cover.
Step 2: Check That the Power Is Really Off
It’s extremely dangerous to work on an electrical panel if the power isn’t completely disconnected. Fortunately, you can use a voltage tester to test whether each breaker is truly turned off. Just attach the neutral bus terminal to one end of a tester and the breaker screws to the other end. If the light on the test light illuminates, that means there’s power running through the breaker. If this happens, stop immediately and call an electrician.
Step 3: Be Smart With a Cardboard Safety Shield
Some components of the panel, particularly the primary lugs and the big black wires, continue to be active even after turning off the main breaker. You can cover these spots with cardboard or an insulating barrier. This prevents your hands from coming into contact with the panel by mistake.
Step 4: Run the Cable Through a Clamp
Pick an empty spot on the panel. Take out the knockout, replace the cable with a plastic one (not metal) and secure it with a clamp. With caution, use a utility knife to peel off the outer jacket and discard the paper insulator. Keep the cords clean and out of sight by taping their ends together.
Step 5: Connect the Cable to the Clamp and Route It Neatly
Once the cable is at least a quarter of an inch within the panel, push it into the clamp. Use an insulated staple to fasten the cable outside the panel, no more than 12 inches from the clamp. Separate the live (black) and neutral (white) wires from the ground (bare) wire and gently wind them toward the vacant breaker slot.
Step 6: Install the New Breaker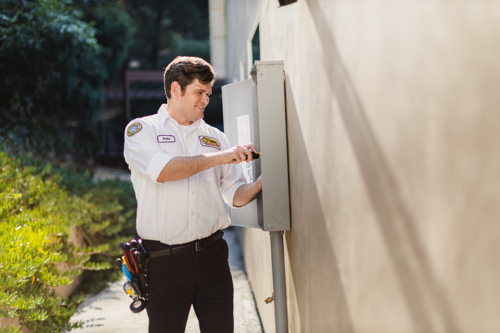
Cut the insulation from the white and black wires, leaving about 5/8 inch. When screwing in an AFCI breaker, be sure to put the hot wire into the terminal. Connect the neutral wire to the breaker’s terminal and then use the white “pigtail” that comes with the breaker to link it to the neutral bus bar. When wiring in a conventional breaker, the white neutral wire should go straight to the neutral bus. Press the breaker down onto the breaker bus until it clicks into place.
Step 7: Connect the Ground Wire
Find an empty spot on your panel’s neutral bus and plug in the exposed green or copper ground wire. Tighten the screw until it is snug, but not so much that you break the wire. When wiring a subpanel, keep the neutral and ground cables on separate bars.
Step 8: Reassemble and Test
Carefully reattach the panel cover, being careful not to crimp any wires, after removing the knockout that corresponds to your new breaker. Put the new breaker in the “on” position once you’ve turned the main breaker back on. Pressing the “Test” button should cause the AFCI to trip instantly. Check your connections again or get expert help if it doesn’t.
Adding new circuits to your breaker box doesn’t have to be a stressful process. With the right tools and skills, you can easily ensure all of your home has sufficient power without risks of overloading. Always remember, you never have to put up with any malarkey! Instead, you can call Mister Sparky.
![]()